How to Install BeamMP – Step-by-Step Guide

Want to play BeamNG.drive with friends? You’ll need BeamMP, the multiplayer mod that adds real-time online play to BeamNG. Installing it is quick and easy — here’s how to do it in just a few minutes.
✅ What You Need Before Installing BeamMP
- A legal copy of BeamNG.drive (Steam only)
- A working Windows PC
- Internet connection
- BeamMP installer (from the official website)
🛠️ How to Install BeamMP (Step-by-Step)
- Download the BeamMP Launcher
👉 Go to the official site: https://beammp.com
Click “Download Client” to get the installer. - Run the Installer
Open the.exefile you downloaded. It will install the BeamMP launcher to your PC. - Let It Locate BeamNG.drive
The launcher will automatically find your BeamNG installation (Steam version required).
If it doesn’t, manually point it to your Steam BeamNG folder. - Launch BeamMP from the Launcher
Once installed, always launch BeamNG through the BeamMP Launcher — this enables multiplayer support. - Join a Server
From the in-game server list, pick any public BeamMP server and click join. Done!
💡 Optional: Install BeamMP Mods
BeamMP supports server-side mods. If you're joining a server with custom vehicles or maps, they’ll download automatically. If you're hosting, you can manually add mods to your server folder.
🧠 Quick Recap
| Step | Action |
|---|---|
| 1. Download | Get BeamMP from beammp.com |
| 2. Install | Run the launcher setup |
| 3. Connect to BeamNG | Let it auto-detect your game |
| 4. Play Online | Launch via the BeamMP Launcher |
| 5. Join Server | Pick one from the in-game list |
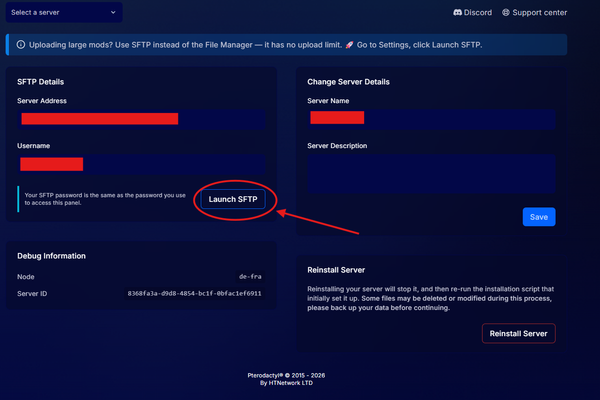
Want to Host Your Own BeamMP Server?
You can host it for free on your own PC, but for better uptime and performance, a Game VPS is ideal.
👉 Check out HTNetwork’s BeamMP-ready Game VPS:
https://htnetwork.one/server-hosting